外观
开发本项目软件建议拥有C/C++、JavaScript、Html、CSS和适当网络基础
4.1 环境搭建
本项目的构建环境为VsCode、PlatformIO完成,当然也可以使用JetBrains CLion、VsStudio或Arduino完成,根据个人喜好选择即可。在本教程中主要使用VsCode作为编译器开发
4.1.1 VsCode安装
方法1:官网下载
VsCode是一个强大的主流代码编辑器,也是完全免费使用的,我们可以在VsCode官网下载安装即可 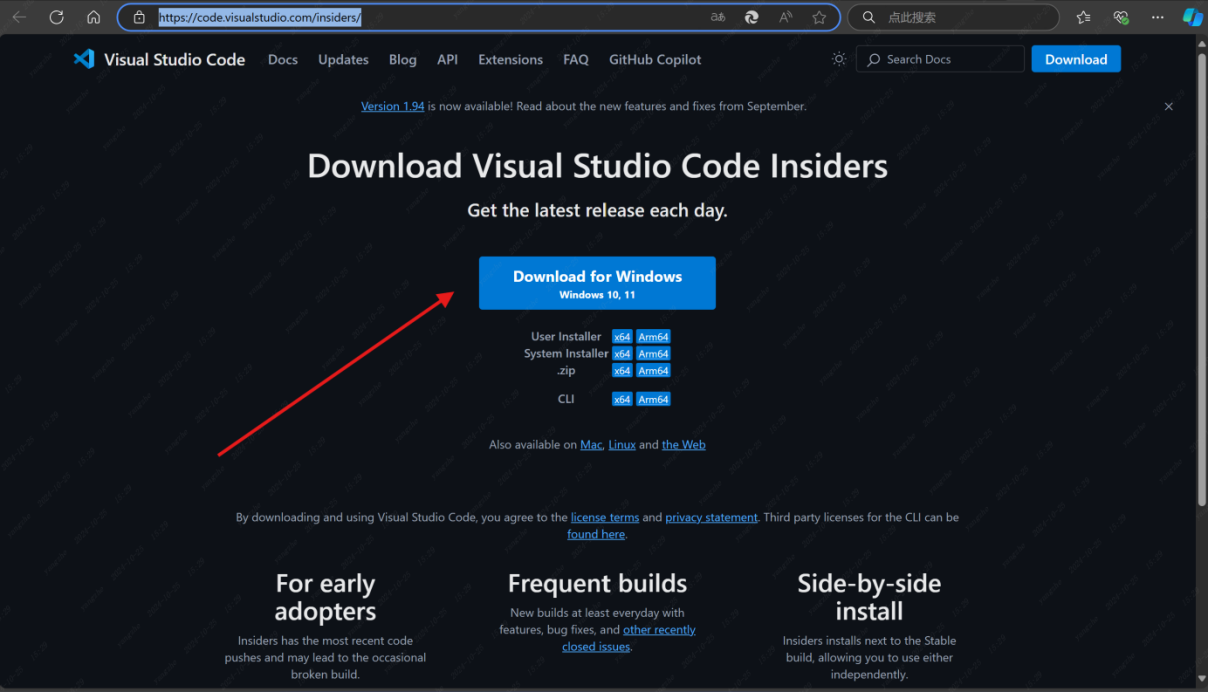 https://code.visualstudio.com/insiders/
方法2:应用商店下载
这种方法更为简便,您可以使用Windows自带微软商店搜索并下载 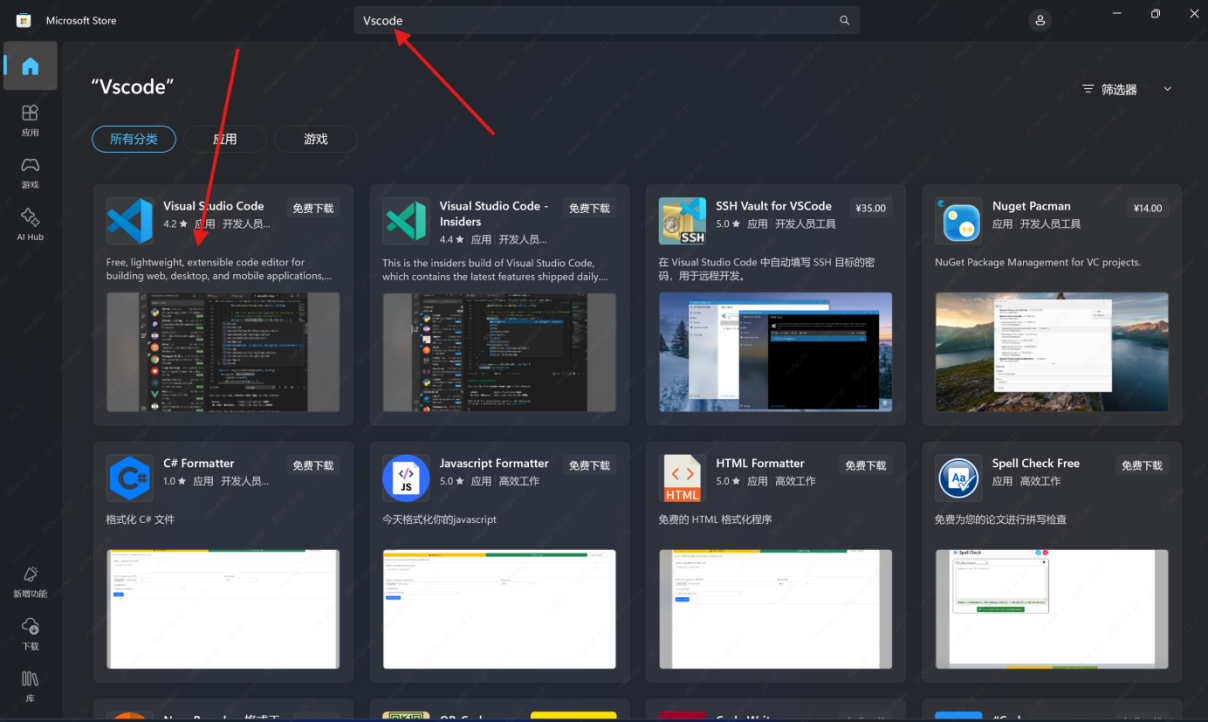
4.1.2 PlatfromIO框架安装
PlatfromIO是一个更强大更专业的开发框架,支持ARM、FPGA、RISC-V以及8位单片机的开发,是一个嵌入式多平台开发工具,可以支持Arduino、ESPIDF、STM32Cube等多个固件的开发,且自定义程度较高、支持开源库的快速安装使用,非常方便。 在VsCode点击左侧插件图标,搜索安装PlatfromIO框架插件即可,使用ArduinoIDE也可直接用ArduinoIDE完成开发,但ArduinoIDE功能有限,修改库函数和板级配置困难,所以不推荐使用 
4.1.3 程序下载说明
ESP8266模组主要使用TTL串口下载方式,准备一个USB转TTL或者DAP-Link即可。
(1)安装CH340驱动
鼠标右键以管理员身份进行安装; 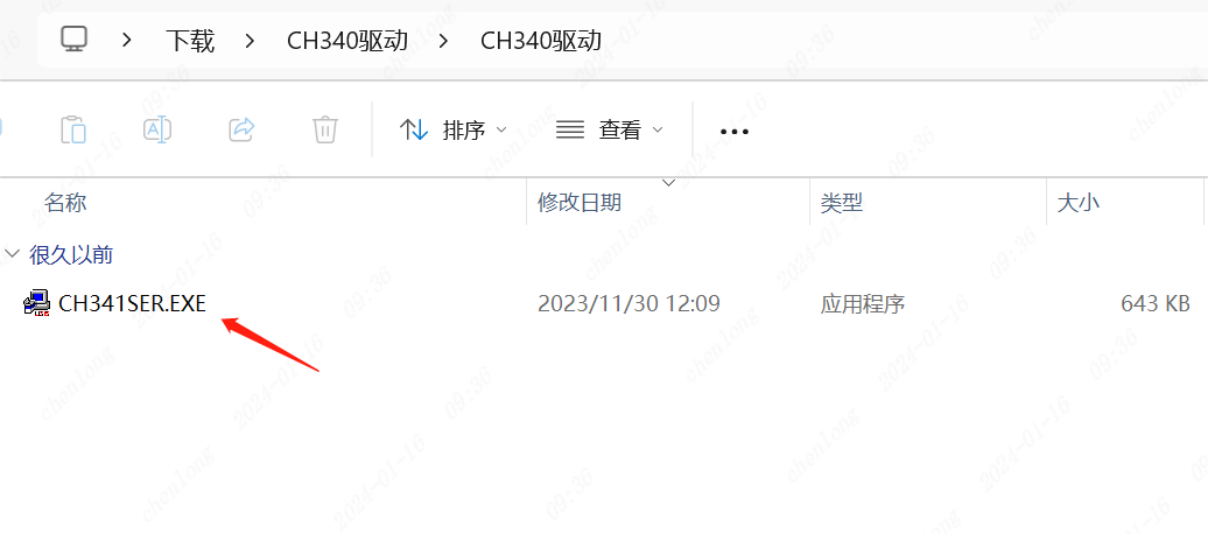 如果出现安装失败,那可能是你电脑已经有了该驱动,你可以尝试先点击卸载,再次安装即可。
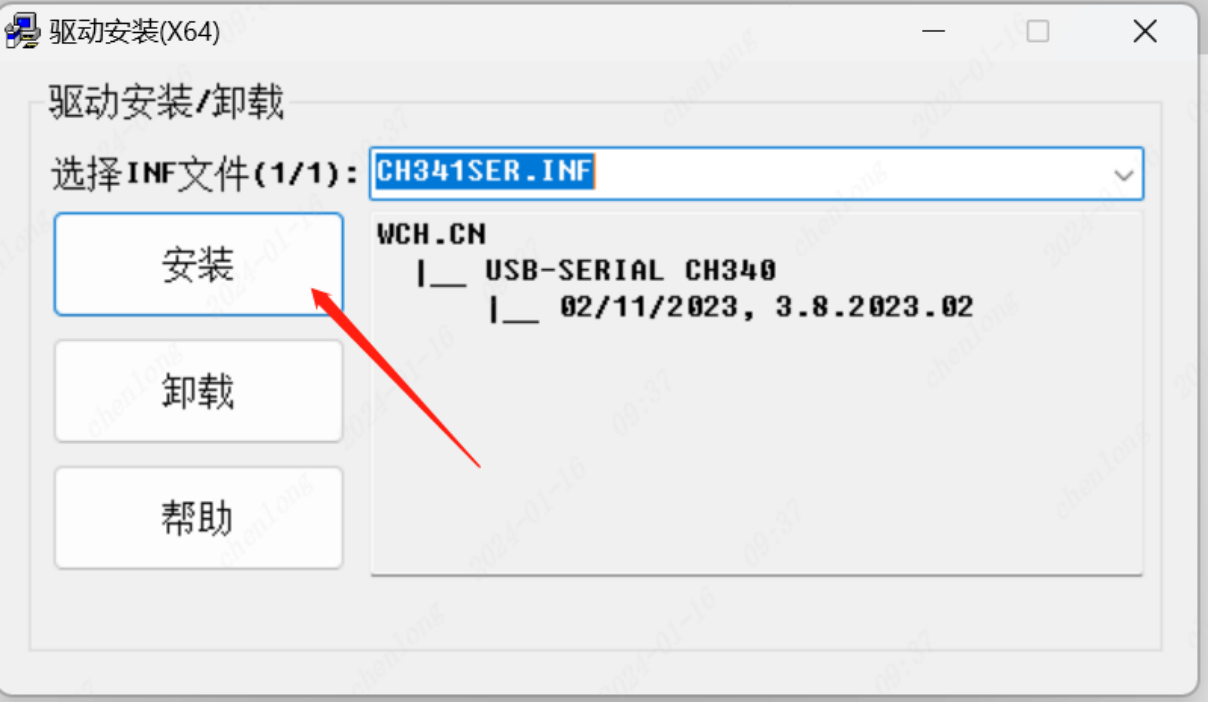
(2)硬件配置
在硬件设计中,我们特意为主板设计了下载模式跳线接口,使用跳帽或镊子短接后再上电,即可进入下载模式进行程序下载。然后再将主板上的TX连接到烧录器的RX,主板上的RX连接到烧录器的TX(RX、TX交叉连接) 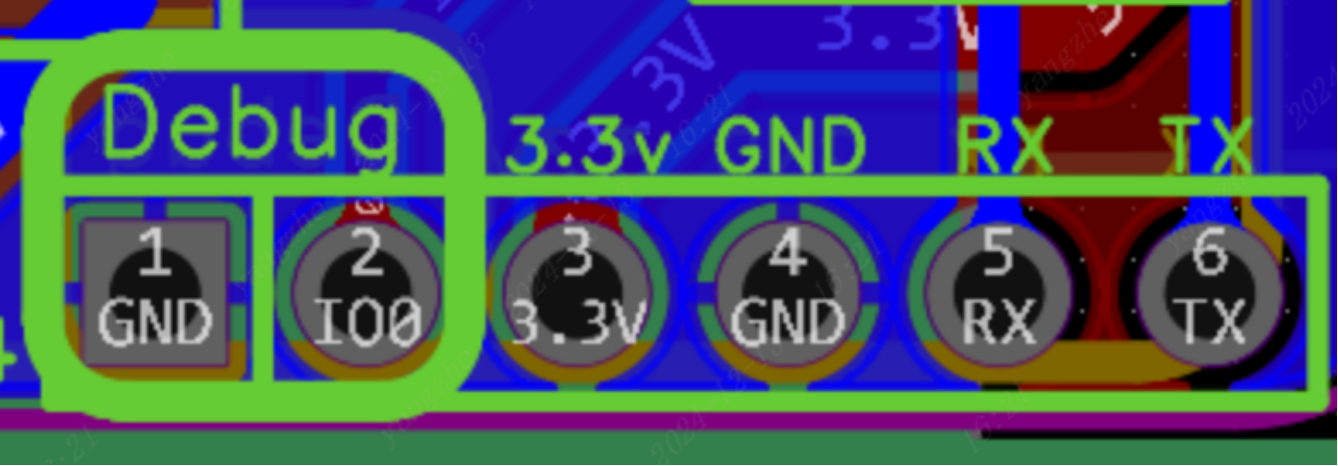 如果成功进入下载模式,此时在VsCode左下角应该有端口选择按钮,点击选择能看到端口
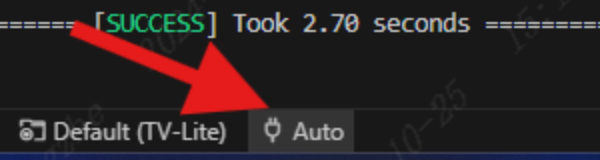
4.2 流程设计
在开发之前,我们先要对整个程序的流程进行设计,确保知道我们的项目需要做什么
4.2.1 整体程序分析
对于本项目来说,我们应该实现表情显示与切换、时钟显示、天气信息显示和Bilibili信息显示并通过长按或短按按键完成交互,大致的程序流程如下 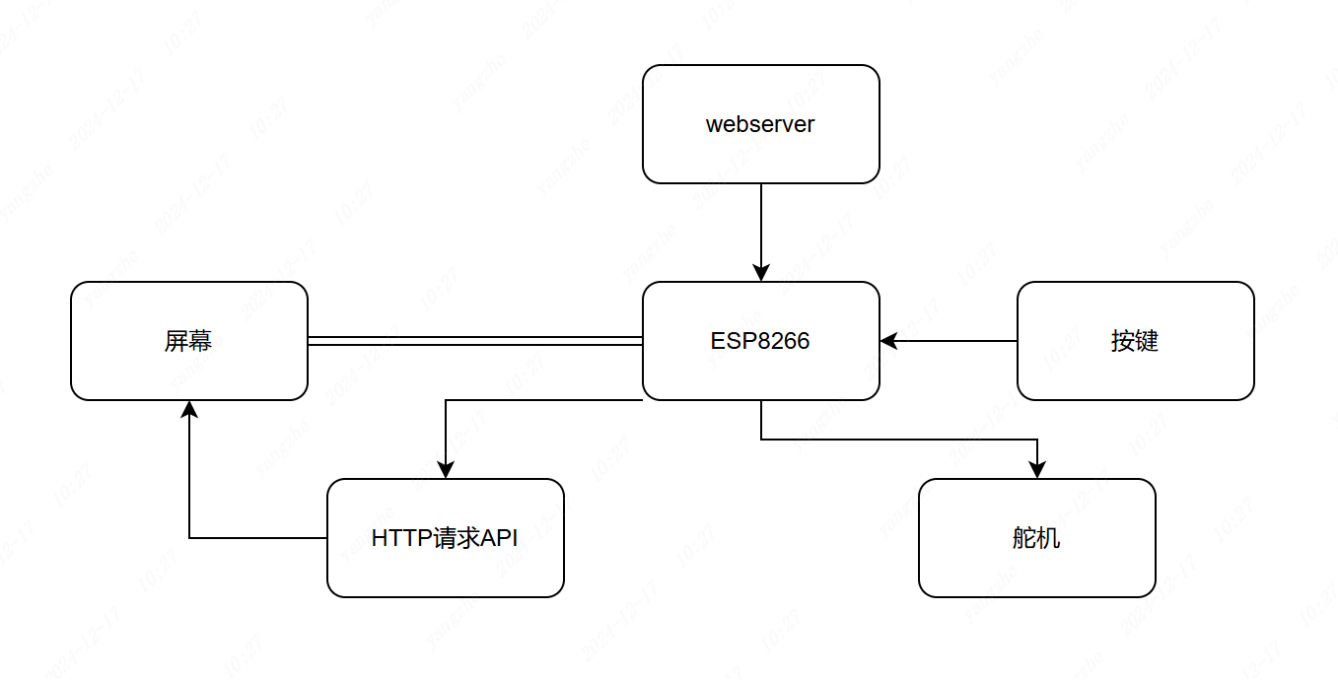 当然,这仅局限于本教程,你也可以为你的小电视开发更多好玩有意思的功能
4.3 创建项目
现在,你应该已经完成了项目环境的配置,有了项目环境就可以开始创建我们的项目了
4.3.1 构建项目框架
首先,我们新建一个PlatformIO项目,修改好项目名称,版型选择NodeMCU中的NodeMCU 1.0,使用Arduino固件然后点击创建。(版型的选择是随意的,主要是选对正确的芯片类型,因为ESP8266有多种款式,我们使用的类型是ESP8266,80MHZ,4M) 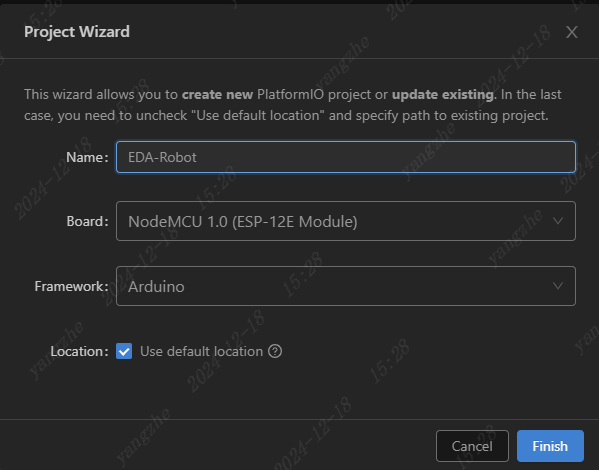
4.3.2 项目结构介绍
(1)项目文件夹
在项目文件夹下共有5个文件夹,这些文件夹我们在后面介绍。我们先来讲解该目录下最为重要的platformio.ini文件,这个文件是用于存放我们需要调用的第三方库和配置板级配置的文件,在这个文件中可以配置分区、配置处理器频率、固件类型等等 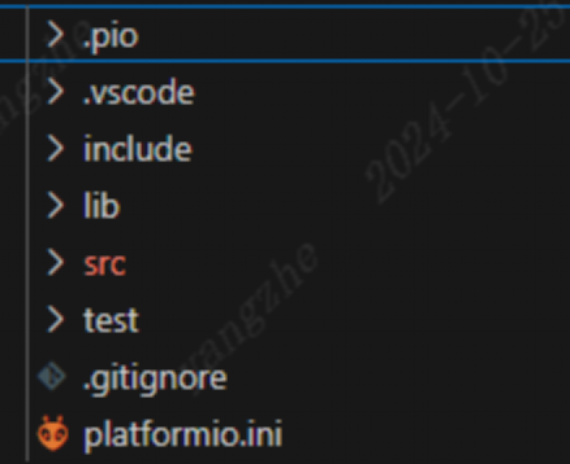
platformio.ini
默认的文件内容如下,platform指的是我们使用的平台,board指的是我们使用的版型,framework指的是我们使用的固件类型,完整的文件配置信息可以查看官方的说明文档 https://docs.platformio.org/en/latest/projectconf/index.html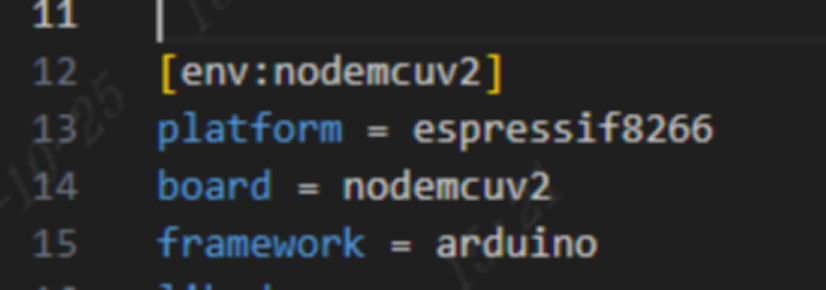
(2).pio文件夹
.pio文件夹是用于存放我们依赖的第三方库文件以及构建后的项目固件及构建文件的地方,默认文件如下 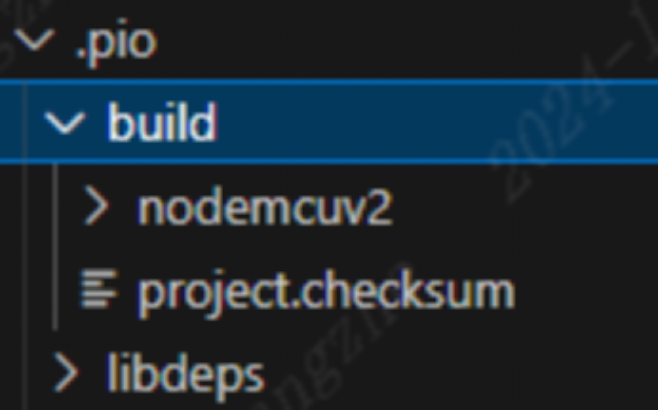
build
用于存放构建文件,生成的固件也会在这个文件夹中
libdeps
当引入第三方库时才会生成该目录,在该目录下可以修改第三方库的源代码
(3)src文件夹
其他文件夹就不再讲解了,主要是用于分类和自行导入第三方库用的。 src文件夹是生成初始程序的文件夹,在新建的项目中会在这里生成main.cpp,这个就是我们的主程序了 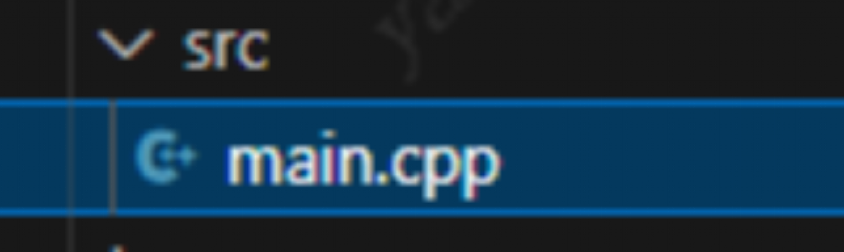
4.3.3 程序结构介绍
这就是一个基本的Arduino程序结构,在程序最上面导入头文件和全局变量。
setup()
在这个方法中我们主要存放需要初始化的代码,在该方法中的所有程序仅在开机时执行一次
loop()
在这个方法在我们主要存放主代码,在该方法中的所有程序会进入死循环,无限次重复执行 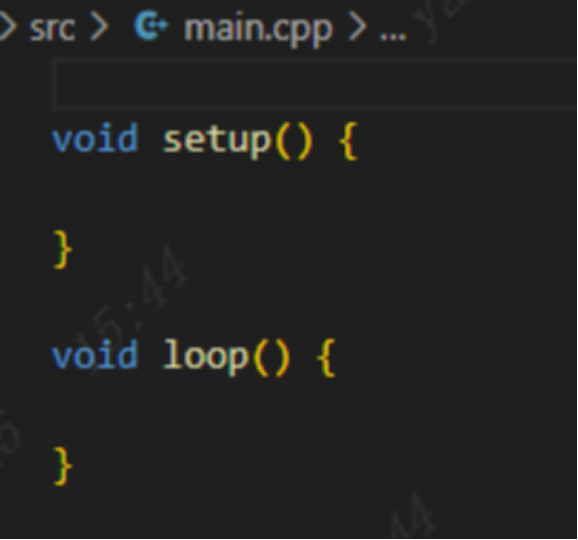
4.4 驱动库
驱动库是我们快速开发的关键,这可以大大缩减我们的开发周期,极大的提升效率。
4.4.1 OLED屏幕
(1)库介绍
对于OLED屏幕,通常可以使用U8g2驱动库驱动,本项目使用的ssd1315驱动和ssd1306驱动是大致一样,通用的,所以这里选择U8g2的ssd1306驱动进行驱动。
(2)库导入
在platformio.ini中最下面添加
lib_deps =
olikraus/U8g2 @ ^2.36.2然后我们点击左侧PlatformIO的图标,选择Dependencies,点击Update更新依赖即可 然后我们点击左侧PlatformIO的图标,选择Dependencies,点击Update更新依赖 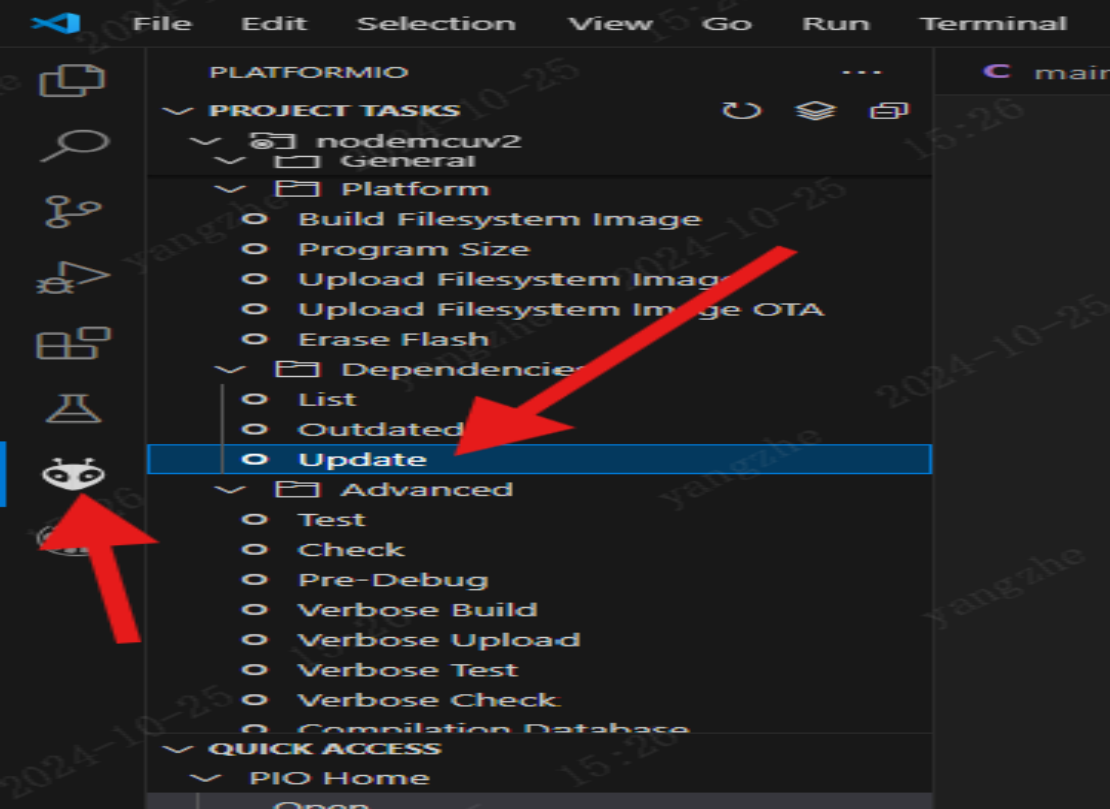
现在platformio会自动拉取第三方库的git仓库到项目
(3)屏幕代码初始化
在main.cpp中最顶部添加
#include <U8g2lib.h>
#include <Wire.h>
U8G2_SSD1306_128X64_NONAME_1_HW_I2C u8g2(U8G2_R0, /* reset=*/U8X8_PIN_NONE, /* clock=*/5, /* data=*/4);在setup()中添加
u8g2.begin();
u8g2.setDisplayRotation(U8G2_R2);4.4.2 NTP
NTPClient 是一个用于在 Arduino 和其他嵌入式设备上获取网络时间的库。它通过网络时间协议(NTP)从互联网的 NTP 服务器获取当前时间,适用于需要精确时间戳的项目,比如时钟、日志记录或定时器等。 主要特点
1.简单易用:
提供直观的 API,使得获取和管理时间变得容易。
2.支持时区:
可以设置时区偏移量,以获取本地时间。
3.定时更新:
支持定期更新时间,确保时钟保持准确。
(1)NTPClient库导入
lib_deps =
arduino-libraries/NTPClient @ ^3.2.1然后我们重新加载
(2)NTP初始化
NTPClient 库是一个简单的 NTP 客户端库,可以从 NTP 服务器同步时间。在这个项目中,ESP8266 使用 NTPClient 获取当前时间,用于显示或其他时间相关的功能。 在main.cpp中最顶部添加
#include <NTPClient.h>
WiFiUDP ntpUDP;
NTPClient timeClient(ntpUDP, "ntp1.aliyun.com", 8 * 3600, 60000);4.4.3 Json格式提取
ArduinoJson 是一个用于在 Arduino 和其他嵌入式平台上处理 JSON 数据的轻量级库。它允许开发者轻松地解析、生成和操作 JSON 数据,非常适合用于处理来自网络请求的响应、配置文件或其他结构化数据。 主要特点
1.轻量级:
设计针对内存受限的环境,内存占用小。
2.易于使用:
提供直观的 API,简单的语法使得 JSON 的创建和解析变得方便。
3.支持动态和静态内存分配:
可以根据需求选择动态分配内存或使用静态数组,适应不同的使用场景。
4.文档生成:
支持生成和解析 JSON 文档,便于处理复杂的数据结构。
Json格式的读取与写入我们使用ArduinoJson库完成
(1)ArduinoJson库导入
lib_deps =
bblanchon/ArduinoJson @ ^7.2.0然后我们重新加载
(2)ArduinoJson初始化
在main.cpp中最顶部添加
#include <ArduinoJson.h>4.4.4 ESPWeb本地服务器
ESPAsyncWebServer 是一个为 ESP8266 和 ESP32 平台设计的异步 Web 服务器库。与传统的 Web 服务器库相比,它允许在处理 HTTP 请求时非阻塞地执行其他操作,适合于需要同时处理多个连接的应用。 主要特点
1.异步处理:
允许同时处理多个客户端连接,而不会阻塞主程序流。
2.简单的 API:
提供易于使用的 API,可以快速设置路由和处理 HTTP 请求。
3.支持多种 HTTP 方法:
支持 GET、POST、PUT、DELETE 等多种 HTTP 方法。
4.处理静态文件:
能够直接提供存储在 SPIFFS 或 LittleFS 文件系统中的静态文件(如HTML、CSS、JavaScript 文件等)。
5.WebSocket 支持:
支持 WebSocket,允许与客户端进行实时双向通信。
为了实现本地网页配网,我们需要一个Web本地服务器
(1)ESPAsyncWebServer库导入
lib_deps =
esphome/ESPAsyncWebServer-esphome @ ^3.2.2然后我们重新加载
(2)ESPAsyncWebServer初始化
在main.cpp中最顶部添加
#include <ESP8266HTTPClient.h>
#include <ESPAsyncWebServer.h>
AsyncWebServer server(80);4.4.5 FS文件系统
FS(文件系统)在微控制器和嵌入式开发中用于管理和存储文件。特别是在Arduino、ESP8266和ESP32等平台上,文件系统可以用来读取和写入数据,便于保存配置、网页文件和其他信息。 常见的文件系统
1.SPIFFS(SPI Flash File System):
设计用于闪存设备,适合于较小的存储需求。
支持文件读取、写入、删除等基本操作。
在ESP8266和ESP32上常用。
2.LittleFS:
提供更好的耐用性和性能,相比SPIFFS在特定场景下更为高效。
支持原子性写入和可变大小的文件,适合更复杂的应用。
(1)FS库导入
在main.cpp中最顶部添加
#include <FS.h>4.4.6 WIFI网络
ESP8266WiFi 是一个专为 ESP8266 微控制器设计的库,用于处理 WiFi 连接。它提供了简单易用的 API,使得开发者可以方便地连接到 WiFi 网络、管理连接、发送和接收数据等。
(1)ESP8266WiFi库导入
在main.cpp中最顶部添加
#include <ESP8266WiFi.h>4.4.7 舵机控制
Servo是一个Arduino官方设计的舵机控制库,用于处理PWM发送。它提供了简单易用的 API,使得开发者可以方便地连接控制电机,当然你也可以手动发送PWM脉冲控制电机。
(1)Servo库导入
在main.cpp中最顶部添加
#include <Servo.h>4.5 图像库
图像库是我们自己创建的库,在这个库里用于存放表情图片的数组,当然你也可以直接把数组直接存在主程序,但这会使得项目变得杂乱,不利于查阅
4.5.1 分辨率
图像中我们尽可能统一分辨率 图标分辨率:64x64 表情分辨率:128x64
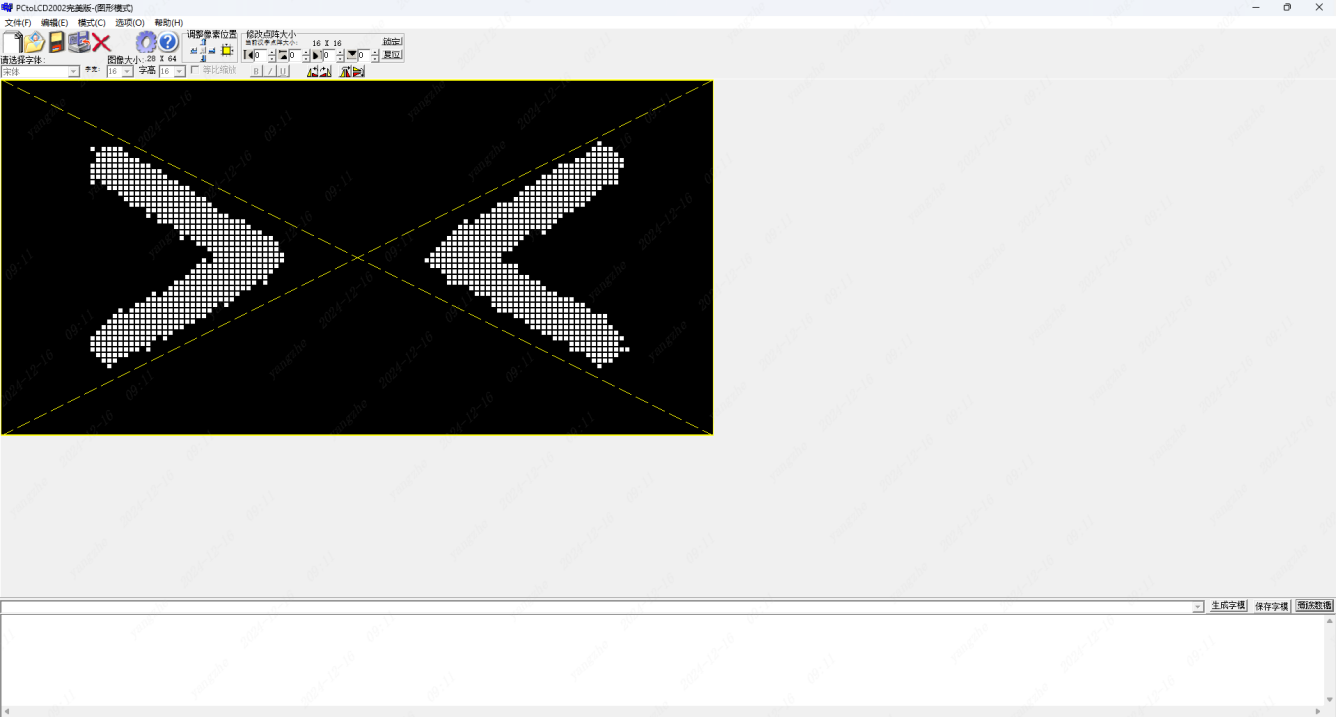
4.5.2 取模
取模的软件有很多,本文档中我们主要使用PCtoLCD2002来完成图像和字库
(1)项目创建
在开始之前,先确保图片的像素已经调整到正确的大小,并且由于是单色屏,还需要将图片进行位图处理,得到BMP格式的位图。 
(2)图像导入
左上角文件夹图标 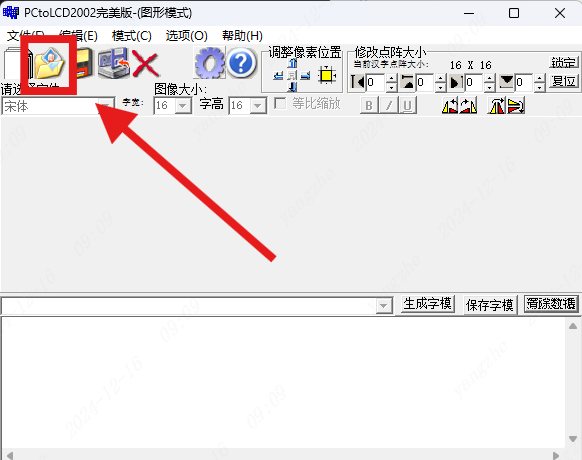
(3)取模设置
点击设置图标确保 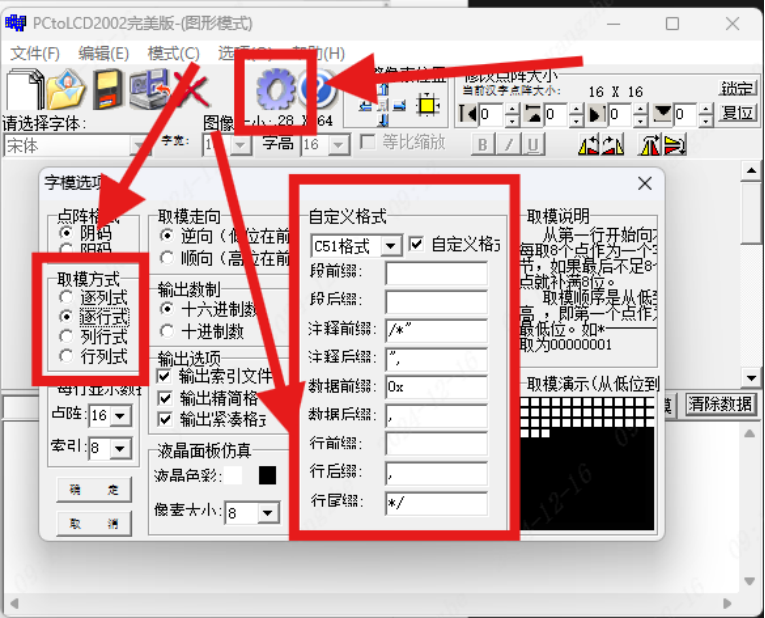
(4)生成
点击生成字模即可获取到对应图片的数组 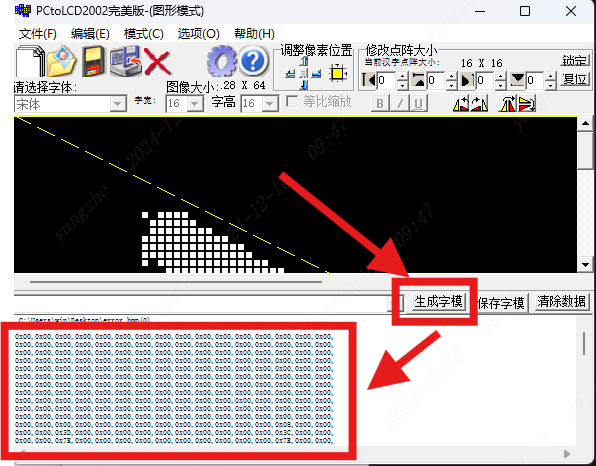
4.5.2 存储
现在我们在src中新建一个image.cpp
const  uint8_t 在此处自定义名称[] PROGMEM= {
//在此处粘贴取模后的数值
};4.5.3 导入
#include "image.cpp"4.6 程序开发
现在,你已经完成了所有准备工作,开始编写程序吧。 为方便理解,本项目教程的程序并没有进行性能和安全优化,如果有需求可以自行修改。 本项目使用C++语言编写,由VSCode+PlatfromIO框架环境完成。 本项目一共创建有15个函数接口
void handleWiFiConfig()//创建Web路由
void loadWiFiConfig()//读取保存在FS文件系统的WIFI信息
void fetchWeather()//获取天气信息
void front()//前进
void back()//后退
void left()//左转
void right()//右转
void sitdown()//坐下
void lie()//躺下
void toplefthand()//举起左手
void toprighthand()//举起右手
void left90()//舵机集体左转90度
void right90()//舵机集体右转990度
void setup()//初始化
void loop()//运行4.6.1 库的导入
这个项目旨在使用 ESP8266 芯片,通过 U8g2库在屏幕上显示图像以及其他信息,同时可以联网并使用 NTP 客户端进行时间同步,以及控制舵机,HTTPClient 用于访问网络数据,ArduinoJson 用于解析 JSON 数据,ESPAsyncWebServer 用于创建 Web 服务器。
#include <Arduino.h>
#include <Servo.h>
#include <U8g2lib.h>
#include <Wire.h>
#include <FS.h>
#include <ESP8266WiFi.h>
#include <ESPAsyncWebServer.h>
#include <ESP8266HTTPClient.h>
#include <NTPClient.h>
#include <ArduinoJson.h>
#include <WiFiUdp.h>
#include "image.cpp"4.6.2 全局变量与定义
(1)按键部分
//---------------按键部分--------------------------
#define BUTTON_PIN 2 // GPIO2 引脚 (D4)
#define BUTTON_PIN2 15
volatile bool buttonPressed = false;     // 按键标志
volatile bool buttonPressed2 = false;    // 按键标志
unsigned long lastPressTime = 0;         // 上次按键时间
const unsigned long debounceDelay = 50;  // 消抖时间 (ms)
unsigned long lastPressTime2 = 0;        // 上次按键时间
const unsigned long debounceDelay2 = 50; // 消抖时间 (ms)(2)ADC部分
//---------------ADC部分--------------------------
const float voltageDividerRatio = 8.4; // 分压比(8.4倍缩小)
const float minVoltage = 6.4; // 电压为0%时
const float maxVoltage = 8.4; // 电压为100%时
const int numSamples = 10;//定义采用次数
float batteryVoltage = 0; // 计算电池电压
int batteryPercentage = 0;//电量百分比(3)舵机部分
//---------------舵机部分--------------------------
Servo servo1;//声明舵机1
Servo servo2;//声明舵机2
Servo servo3;//声明舵机3
Servo servo4;//声明舵机4
int engine1 = 14;                 // 舵机1引脚
int engine2 = 16;                 // 舵机2引脚
int engine3 = 12;                 // 舵机3引脚
int engine4 = 13; // 舵机4引脚(4)屏幕部分
//---------------屏幕部分--------------------------
U8G2_SSD1306_128X64_NONAME_1_HW_I2C u8g2(U8G2_R0, /* reset=*/U8X8_PIN_NONE, /* clock=*/5, /* data=*/4); // 使用SSD1306屏幕驱动,时钟引脚5,数据引脚4(5)网络部分
//---------------网络部分--------------------------
const char *ssid = "EDA-Robot";//WIFI名称
const char *password = ""; // 无密码
AsyncWebServer server(80);//设置服务器端口
WiFiUDP ntpUDP;//声明UDP
NTPClient timeClient(ntpUDP, "ntp1.aliyun.com", 8 * 3600, 60000);//配置NTP服务器(6)API部分
const char *weatherAPI = "http://api.seniverse.com/v3/weather/daily.json?key=";//心知天气API地址
String temperature = "";//天气温度
String humidity = "";//天气湿度
String weather = "";//天气
String cityname = "";//城市名称
String weatherapi = "";//心知天气API密钥(7)标签部分
//---------------标签部分--------------------------
bool initweather = false;  // 天气初始化
bool freestate = false;//自由模式标签
int prevEmojiState = -1; // 用于跟踪之前的 emojiState
int actionstate = 0;//活动状态标签
int emojiState = 0; // 表情状态标签这些字符串变量用于存储天气和 B 站信息,例如温度、湿度、天气、粉丝数量等,便于在屏幕或 Web 页面上显示。
(8)文件系统部分
const char *ssidFile = "/ssid.json";//配置存储文件名及路径4.6.4 页面开发
(1) 配置框架
创建文件夹 在项目目录下我们新建一个data文件夹,用于存放要烧录到FS文件系统的文件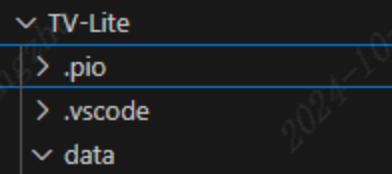
index.html文件
在data文件夹下新建一个index.html文件,用于存放我们的配网页面
(2)index.html索引页
为了布局美化,我们简单设计了几个style,用于美化UI 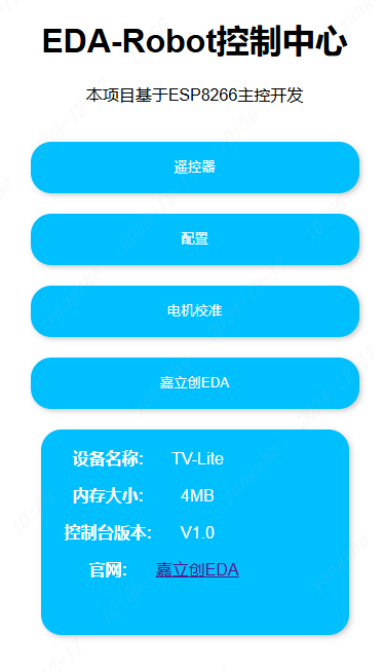
<!DOCTYPE html>
<html lang='en'>
<head>
    <meta charset='UTF-8'>
    <meta name='viewport' content='width=device-width, initial-scale=1.0'>
    <title>EDA-Robot</title>
    <style>

        body {
            margin: 0;
            padding: 0;
            font-family: Arial, sans-serif;
        }

        .container {
            max-width: 800px;
            margin: 0 auto;
            padding: 20px;
            text-align: center;
        }

        h1 {
            text-align: center;
        }

        .button {
            display: inline-block;
            height: 30px;
            width: 300px;
            margin-top: 20px;

            padding: 10px 20px;
            background-color: deepskyblue;
            color: #fff;
            border: none;
            border-radius: 20px; /* 添加圆角 */
            text-decoration: none;
            line-height: 2; /* 通过调整line-height的值来调整文字的垂直位置 */
            text-align: center; /* 文字居中 */
            box-shadow: 2px 2px 5px rgba(0, 0, 0, 0.2); /* 添加立体感 */
            transition: all 0.3s ease; /* 添加过渡效果 */
        }

        .button:hover {
            background-color: skyblue; /* 鼠标悬停时的背景颜色 */
            transform: translateY(2px); /* 点击效果 */
            box-shadow: 2px 2px 8px rgba(0, 0, 0, 0.3); /* 添加更多立体感 */
        }

    </style>

</head>
<body>

<div class='container'>
    <h1>EDA-Robot控制中心</h1>
    <h3>180度限位舵机版</h3>
    <p>本项目基于ESP8266主控开发</p>
    <input type='button'  style="height: 50px;width: 320px"  class='button'  value="遥控器"onclick="window.location.href='./control.html'">
    <input type='button'  style="height: 50px;width: 320px"  class='button'  value="配置"onclick="window.location.href='./setting.html'">
    <input type='button'  style="height: 50px; width: 320px"  class='button'  value="嘉立创EDA">
    <a href="https://lceda.cn/">
        <table class="container button" style="height: 200px">
            <tr>
                <th>设备名称:</th>
                <td>EDA-Robot</td>
            </tr>
            <tr>
                <th>内存大小:</th>
                <td>4MB</td>
            </tr>
            <tr>
                <th>控制台版本:</th>
                <td>V1.0</td>
            </tr>
            <tr>
                <th>官网:</th>
                <td> <a href="https://lceda.cn/">嘉立创EDA</a></td>
            </tr>

        </table>
    </a>
</div>

</body>
</html>(3)setting.html控制页
这里我们使用from表单的形式提交设置数据 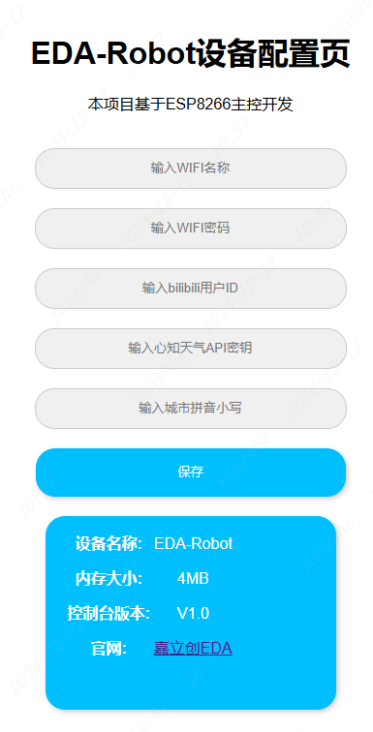
<!DOCTYPE html>
<html lang='en'>
<head>
    <meta charset='UTF-8'>
    <meta name='viewport' content='width=device-width, initial-scale=1.0'>
    <title>EDA-Robot</title>
    <style>

        body {
            margin: 0;
            padding: 0;
            font-family: Arial, sans-serif;
        }

        .container {
            max-width: 800px;
            margin: 0 auto;
            padding: 20px;
            text-align: center;
        }

        h1 {
            text-align: center;
        }

        .button {
            display: inline-block;
            height: 30px;
            width: 300px;
            margin-top: 20px;

            padding: 10px 20px;
            background-color: deepskyblue;
            color: #fff;
            border: none;
            border-radius: 20px; /* 添加圆角 */
            text-decoration: none;
            line-height: 2; /* 通过调整line-height的值来调整文字的垂直位置 */
            text-align: center; /* 文字居中 */
            box-shadow: 2px 2px 5px rgba(0, 0, 0, 0.2); /* 添加立体感 */
            transition: all 0.3s ease; /* 添加过渡效果 */
        }

        .button:hover {
            background-color: skyblue; /* 鼠标悬停时的背景颜色 */
            transform: translateY(2px); /* 点击效果 */
            box-shadow: 2px 2px 8px rgba(0, 0, 0, 0.3); /* 添加更多立体感 */
        }
        .search-box {
            margin-top: 20px;
            display: inline-block;
            height: 30px;
            width: 300px;
            padding: 5px 10px;
            background-color: #f0f0f0;
            border: 1px solid #ccc;
            border-radius: 20px;
            text-align: center; /* 文字居中 */
        }
        .hidden {
            display: none; /* 初始隐藏 */
        }
    </style>

</head>
<body>
<form action='/connect' method='POST'>
    <div class='container'>
        <h1>EDA-Robot设备配置页</h1>
        <p>本项目基于ESP8266主控开发</p>
        <input type='text' name='ssid' placeholder='输入WIFI名称' class='search-box'>
        <input type='password' name='pass' placeholder='输入WIFI密码' class='search-box'>
        <input type='api' name='api' placeholder='输入心知天气API密钥' class='search-box'>
        <input type='city' name='city' placeholder='输入城市拼音小写' class='search-box'>
        <input type='submit'  style="height: 50px;width: 320px"  class='button'  value="保存">
        <a href="https://lceda.cn/">
            <table class="container button" style="height: 200px">
                <tr>
                    <th>设备名称:</th>
                    <td>EDA-Robot</td>
                </tr>
                <tr>
                    <th>内存大小:</th>
                    <td>4MB</td>
                </tr>
                <tr>
                    <th>控制台版本:</th>
                    <td>V1.0</td>
                </tr>
                <tr>
                    <th>官网:</th>
                    <td> <a href="https://lceda.cn/">嘉立创EDA</a></td>
                </tr>

            </table>
        </a>
    </div>
</form>
</body>
</html>(5)control.html控制页
控制页面是控制机械狗的主要页面,这里主要看AJAX请求函数,这部分的请求与等下的页面路由监听代码相对应,我们通过点击页面按钮触发请求。这里进行了一些简化操作,避免html过长过大导致html加载和响应缓慢,这可能导致esp8266无法正确显示页面。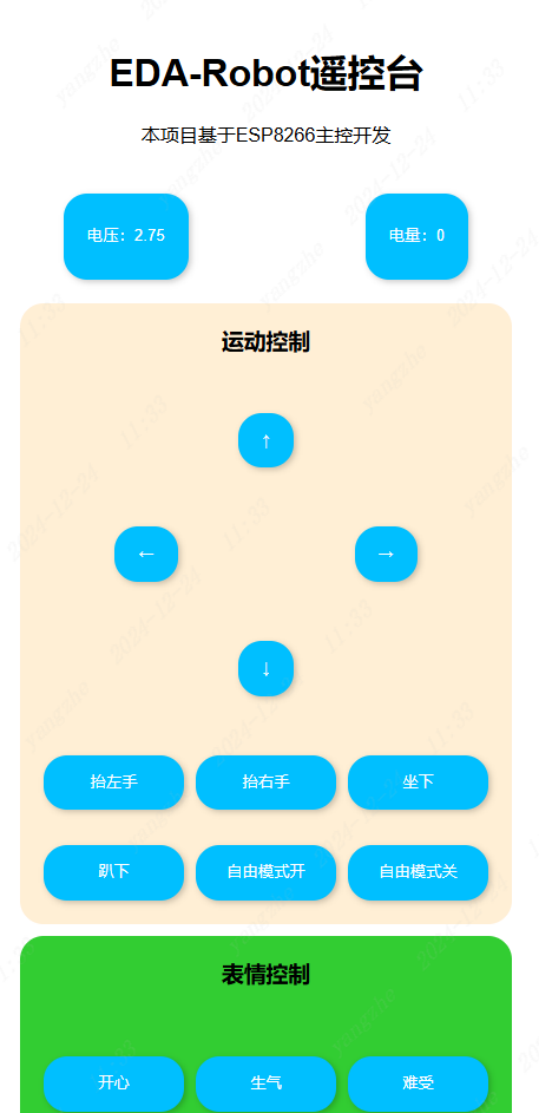
<!DOCTYPE html>
<html lang='en'>
<head>
    <meta charset='UTF-8'>
    <meta name='viewport' content='width=device-width, initial-scale=1.0'>
    <title>EDA-Robot</title>
    <style>

        body {
            margin: 0;
            padding: 0;
            font-family: Arial, sans-serif;
        }

        .container {
            max-width: 800px;
            margin: 0 auto;
            padding: 20px;
            text-align: center;
        }

        h1 {
            text-align: center;
        }

        button {
            display: inline-block;
            height: auto;
            width: auto;
            margin-top: 20px;

            padding: 10px 20px;
            background-color: deepskyblue;
            color: #fff;
            border: none;
            border-radius: 20px; /* 添加圆角 */
            text-decoration: none;
            line-height: 2; /* 通过调整line-height的值来调整文字的垂直位置 */
            text-align: center; /* 文字居中 */
            box-shadow: 2px 2px 5px rgba(0, 0, 0, 0.2); /* 添加立体感 */
            transition: all 0.3s ease; /* 添加过渡效果 */
        }

        button:hover {
            background-color: skyblue; /* 鼠标悬停时的背景颜色 */
            transform: translateY(2px); /* 点击效果 */
            box-shadow: 2px 2px 8px rgba(0, 0, 0, 0.3); /* 添加更多立体感 */
        }
        .button-grid3 {
            display: grid;
            grid-template-columns: repeat(3, 1fr);
            gap: 10px;
            justify-content: center;
            align-content: center;
            text-align: center;
            margin: 20px;
        }
        .button-grid2 {
            display: grid;
            grid-template-columns: repeat(2, 1fr);
            gap: 10px;
            justify-content: center;
            align-content: center;
            text-align: center;
            margin: 20px;
        } .button-grid1 {
              display: grid;
              border-radius: 20px; /* 添加圆角 */
              grid-template-columns: repeat(1, 1fr);
              justify-content: center;
              align-content: center;
              text-align: center;
              margin: 10px;

          }

    </style>
    <script>
        // 简化 AJAX 请求函数
        function sendCommand(action) {
            fetch(`/${action}`)
                .then(response => response.text())
                .catch(() => alert('发送失败,请检查设备连接'));
        }

        function refreshState(url, displayElementId) {
            fetch(url)
                .then(response => response.text())
                .then(data => {
                    document.getElementById(displayElementId).innerText = data;
                });
        }

        function setRefreshInterval(url, displayElementId) {
            setInterval(() => refreshState(url, displayElementId), 1000);
        }

        const states = [
            { url: '/batteryVoltage', displayId: 'batteryVoltageDisplay' },
            { url: '/batteryPercentage', displayId: 'batteryPercentageDisplay' },
        ];

        states.forEach(state => setRefreshInterval(state.url, state.displayId));

    </script>
</head>
<body>
<div class='container'>
    <h1>EDA-Robot遥控台</h1>
    <p>本项目基于ESP8266主控开发</p >
    <div class="button-grid2" style="display: flex; justify-content: center;">
        <button style="margin-right: 70px"><p>电压:<span id="batteryVoltageDisplay">0</span></p></button>
        <button style="margin-left: 70px"><p>电量:<span id="batteryPercentageDisplay">0</span></p></button>
    </div>
    <!-- 运动控制 -->
    <div class="button-grid1" style="background-color: papayawhip">
        <h3>运动控制</h3>
        <div class="button-grid1"style="display: flex; justify-content: center;">
            <button  onclick="sendCommand('front')">↑</button>
        </div>
        <div class="button-grid2" style="display: flex; justify-content: center;">
            <button  onclick="sendCommand('left')" style="margin-right: 70px">←</button>
            <button  onclick="sendCommand('right')" style="margin-left: 70px">→</button>
        </div>
        <div class="button-grid1" style="display: flex; justify-content: center;">
            <button  onclick="sendCommand('back')">↓</button>
        </div>
        <div  class="button-grid3">
            <button onclick="sendCommand('toplefthand')">抬左手</button>
            <button onclick="sendCommand('toprighthand')">抬右手</button>
            <button onclick="sendCommand('sitdown')">坐下</button>
            <button onclick="sendCommand('lie')">趴下</button>

            <button onclick="sendCommand('free')">自由模式开</button>
            <button onclick="sendCommand('offfree')">自由模式关</button>
        </div>
        <div  class="button-grid1">
            <button onclick="sendCommand('sleep')">回收</button>
            </div>
    </div>

    <!-- 表情控制 -->
    <div class="button-grid1" style="background-color: limegreen">
        <h3>表情控制</h3>
        <div class="button-grid3" >
            <button onclick="sendCommand('histate')">开心</button>
            <button onclick="sendCommand('angrystate')">生气</button>
            <button onclick="sendCommand('sickstate')">难受</button>
            <button onclick="sendCommand('dowhatstate')">好奇</button>
            <button onclick="sendCommand('lovestate')">喜欢</button>
            <button onclick="sendCommand('errorstate')">错误</button>
            <button onclick="sendCommand('yunstate')">晕</button>
            <button onclick="sendCommand('edastate')">嘉立创LOGO</button>
        </div>
    </div>

    <!-- 联网功能 -->
    <div class="button-grid1" style="background-color: orange">
        <h3>联网功能</h3>
        <div class="button-grid2">
            <button onclick="sendCommand('time')">时间</button>
            <button onclick="sendCommand('weather')">天气</button>


        </div>
    </div>

</div>
</body>
</html>4.6.5 路由配置逻辑
前面我们已经完成了页面开发部分,并在html内定义了一些路由节点,为了确保这些路由能正确触发并被我们监听到触发事件,我们还需要在cpp程序内定义路由监听事件,确保硬件舵机能正确执行命令。这部分的代码较长,是所有WebServer的页面路由监听,与页面中按钮的点击操作触发的url对应,这里的url务必检查仔细,如果不能对应就无法监听到页面请求是否触发,硬件也无法做出对应的响应。
//---------------配置页面路由--------------------------
void handleWiFiConfig()
{

server.on("/front", HTTP_GET, [](AsyncWebServerRequest *request) {// 当访问 /front 路径时触发舵机动作
    actionstate = 1;  // 更新全局动作状态标志(1通常表示前进/前方动作)


    request->send(200, "text/plain", "Front function started"); // 立即响应客户端,避免阻塞(状态码200,返回纯文本确认信息)
});
//以下函数相同,不再注释
    server.on("/back", HTTP_GET, [](AsyncWebServerRequest *request)
              {
       actionstate = 4;   // 设置标志,执行舵机动作
        request->send(200, "text/plain", "Front function started"); });
    server.on("/left", HTTP_GET, [](AsyncWebServerRequest *request)
              {
       actionstate = 2;  // 设置标志,执行舵机动作
        request->send(200, "text/plain", "Front function started"); });
    server.on("/right", HTTP_GET, [](AsyncWebServerRequest *request)
              {
       actionstate = 3;  // 设置标志,执行舵机动作
        request->send(200, "text/plain", "Front function started"); });
    server.on("/toplefthand", HTTP_GET, [](AsyncWebServerRequest *request)
              {
        actionstate = 5;   // 设置标志,执行舵机动作
        request->send(200, "text/plain", "Front function started"); });
    server.on("/toprighthand", HTTP_GET, [](AsyncWebServerRequest *request)
              {
        actionstate = 6;  // 设置标志,执行舵机动作
        request->send(200, "text/plain", "Front function started"); });
    server.on("/sitdown", HTTP_GET, [](AsyncWebServerRequest *request)
              {
        actionstate = 8;  // 设置标志,执行舵机动作
        request->send(200, "text/plain", "Front function started"); });
    server.on("/lie", HTTP_GET, [](AsyncWebServerRequest *request)
              {
      actionstate = 7;
        request->send(200, "text/plain", "Front function started"); });
         server.on("/sleep", HTTP_GET, [](AsyncWebServerRequest *request)
              {
      actionstate = 10;
        request->send(200, "text/plain", "Front function started"); });
    server.on("/free", HTTP_GET, [](AsyncWebServerRequest *request)
              {
      freestate=true;
        request->send(200, "text/plain", "Front function started"); });
    server.on("/offfree", HTTP_GET, [](AsyncWebServerRequest *request)
              {
      freestate=false;
        request->send(200, "text/plain", "Front function started"); });
    server.on("/histate", HTTP_GET, [](AsyncWebServerRequest *request)
              {
        emojiState = 0;  // 设置标志,执行舵机动作
        request->send(200, "text/plain", "Front function started"); });
    server.on("/angrystate", HTTP_GET, [](AsyncWebServerRequest *request)
              {
        emojiState = 1;   // 设置标志,执行舵机动作
        request->send(200, "text/plain", "Front function started"); });
    server.on("/edastate", HTTP_GET, [](AsyncWebServerRequest *request)
              {
        emojiState = 9;   // 设置标志,执行舵机动作
        request->send(200, "text/plain", "Front function started"); });

    server.on("/errorstate", HTTP_GET, [](AsyncWebServerRequest *request)
              {
       emojiState = 2;  // 设置标志,执行舵机动作
        request->send(200, "text/plain", "Front function started"); });
    server.on("/batteryVoltage", HTTP_GET, [](AsyncWebServerRequest *request)
              { request->send(200, "text/plain", String(batteryVoltage)); });
    server.on("/batteryPercentage", HTTP_GET, [](AsyncWebServerRequest *request)
              { request->send(200, "text/plain", String(batteryPercentage)); });
    server.on("/dowhatstate", HTTP_GET, [](AsyncWebServerRequest *request)
              {
       emojiState = 3;  // 设置标志,执行舵机动作
        request->send(200, "text/plain", "Front function started"); });
    server.on("/lovestate", HTTP_GET, [](AsyncWebServerRequest *request)
              {
       emojiState = 4;  // 设置标志,执行舵机动作
        request->send(200, "text/plain", "Front function started"); });
    server.on("/sickstate", HTTP_GET, [](AsyncWebServerRequest *request)
              {
       emojiState = 5;  // 设置标志,执行舵机动作
        request->send(200, "text/plain", "Front function started"); });
    server.on("/yunstate", HTTP_GET, [](AsyncWebServerRequest *request)
              {
       emojiState = 6;
        request->send(200, "text/plain", "Front function started"); });
    server.on("/time", HTTP_GET, [](AsyncWebServerRequest *request)
              {
       emojiState = 8;
        request->send(200, "text/plain", "Front function started"); });
    server.on("/weather", HTTP_GET, [](AsyncWebServerRequest *request)
              {
       emojiState = 7;  // 设置标志,执行舵机动作
        request->send(200, "text/plain", "Front function started"); });

    server.on("/connect", HTTP_POST, [](AsyncWebServerRequest *request)
              {
        // 获取POST参数:ssid、pass、city、api
        String ssid = request->getParam("ssid", true)->value();
        String pass = request->getParam("pass", true)->value();
        String city = request->getParam("city", true)->value();
        String api = request->getParam("api", true)->value();

        // 打印接收到的参数
        Serial.println(ssid);
        Serial.println(pass);

        // 保存WiFi信息到JSON文件
        DynamicJsonDocument doc(1024);
        doc["ssid"] = ssid;
        doc["pass"] = pass;
        doc["city"] = city;
        doc["api"] = api;
        fs::File file = SPIFFS.open(ssidFile, "w");  // 打开文件进行写入
        if (file) {
            serializeJson(doc, file);  // 将JSON内容写入文件
            file.close();  // 关闭文件
        }

        // 更新全局变量
        cityname = city;
        weatherapi = api;

        // 开始连接WiFi
        WiFi.begin(ssid.c_str(), pass.c_str());
        // 发送HTML响应,告知用户正在连接
        // 发送带UTF-8编码声明的HTML响应
request->send(200, "text/html; charset=UTF-8",
    "<!DOCTYPE html>"
    "<html>"
    "<head>"
    "    <meta charset='UTF-8'>"
    "    <title>状态</title>"
    "</head>"
    "<body>"
    "    <h1>请返回使用在线功能,如果能正常获取则配置成功!</h1>"
    "</body>"
    "</html>"
);}
   );

    server.on("/", HTTP_GET, [](AsyncWebServerRequest *request)
              {
        // 检查SPIFFS文件系统中是否存在index.html文件
        if (SPIFFS.exists("/index.html")) {
            fs::File file = SPIFFS.open("/index.html", "r");  // 打开index.html文件
            if (file) {
                size_t fileSize = file.size();  // 获取文件大小
                String fileContent;

                // 逐字节读取文件内容
                while (file.available()) {
                    fileContent += (char)file.read();
                }
                file.close();  // 关闭文件

                // 返回HTML内容
                request->send(200, "text/html", fileContent);
                return;
            }
        }
        // 如果文件不存在,返回404错误
        request->send(404, "text/plain", "File Not Found"); });
    server.on("/control.html", HTTP_GET, [](AsyncWebServerRequest *request)
              {
        // 检查SPIFFS文件系统中是否存在index.html文件
        if (SPIFFS.exists("/control.html")) {
            fs::File file = SPIFFS.open("/control.html", "r");  // 打开index.html文件
            if (file) {
                size_t fileSize = file.size();  // 获取文件大小
                String fileContent;

                // 逐字节读取文件内容
                while (file.available()) {
                    fileContent += (char)file.read();
                }
                file.close();  // 关闭文件

                // 返回HTML内容
                request->send(200, "text/html", fileContent);
                return;
            }
        }
        // 如果文件不存在,返回404错误
        request->send(404, "text/plain", "File Not Found"); });
    server.on("/engine.html", HTTP_GET, [](AsyncWebServerRequest *request)
              {
        // 检查SPIFFS文件系统中是否存在index.html文件
        if (SPIFFS.exists("/engine.html")) {
            fs::File file = SPIFFS.open("/engine.html", "r");  // 打开index.html文件
            if (file) {
                size_t fileSize = file.size();  // 获取文件大小
                String fileContent;

                // 逐字节读取文件内容
                while (file.available()) {
                    fileContent += (char)file.read();
                }
                file.close();  // 关闭文件

                // 返回HTML内容
                request->send(200, "text/html", fileContent);//发送文件内容
                return;
            }
        }
        // 如果文件不存在,返回404错误
        request->send(404, "text/plain", "File Not Found"); });
    server.on("/setting.html", HTTP_GET, [](AsyncWebServerRequest *request)
              {
        // 检查SPIFFS文件系统中是否存在index.html文件
        if (SPIFFS.exists("/setting.html")) {
            fs::File file = SPIFFS.open("/setting.html", "r");  // 打开index.html文件
            if (file) {
                size_t fileSize = file.size();  // 获取文件大小
                String fileContent;

                // 逐字节读取文件内容
                while (file.available()) {
                    fileContent += (char)file.read();
                }
                file.close();  // 关闭文件

                // 返回HTML内容
                request->send(200, "text/html", fileContent);
                return;
            }
        }
        // 如果文件不存在,返回404错误
        request->send(404, "text/plain", "File Not Found"); });
    // 启动服务器
    server.begin();
};handleWiFiConfig()方法就是我们定义的路由,这里是所有web路由监听事件,在配置路由时务必确保html的触发事件和cpp程序的监听事件路由一致,否则可能出现触发不生效问题。在路由中我们通过emojiState记录表情事件,通过actionstate记录运动事件,因为如果直接在路由内编写运动事件可能会导致html无响应,触发单片机死机重启。因此我们通过记录事件状态然后再到loop中执行,确保异步操作正常,提升页面响应速度。
4.6.6 WIFI配置加载
在前面的handleWiFiConfig()中,我们定义的/connect路由中,我们将设置信息保存在FS文件系统中,为了方便用户在断电重启后避免二次配置,所以还需要写一个将FS保存的WIFI配置同步到全局定义上。
void loadWiFiConfig()
{
    // 初始化SPIFFS文件系统(存储WiFi配置等信息)
if (SPIFFS.begin()) // 成功挂载文件系统
{
    // 尝试打开存储WiFi配置的JSON文件(需提前创建)
    fs::File file = SPIFFS.open(ssidFile, "r"); // "r"表示只读模式
    if (file) // 文件存在且可访问
    {
        // 创建动态JSON文档(容量需根据实际配置数据调整)
        DynamicJsonDocument doc(1024); // 建议至少1024字节存储配置参数

        // 反序列化JSON数据(将文件内容解析为JSON对象)
        DeserializationError error = deserializeJson(doc, file);

        if (!error) // JSON解析成功
        {
            // 从JSON对象中提取配置参数
            String ssid = doc["ssid"];     // WiFi名称字段
            String pass = doc["pass"];     // WiFi密码字段
            String city = doc["city"];     // 城市代码字段
            String api = doc["api"];       // 天气API密钥字段

            // 将配置参数赋给全局变量
            cityname = city;        // 存储城市代码
            weatherapi = api;       // 存储API密钥

            // 使用存储的凭证尝试连接WiFi
            WiFi.begin(ssid.c_str(), pass.c_str()); // 转换为C风格字符串

            // 设置5秒连接超时(5000ms)
            unsigned long startAttemptTime = millis();
            while (WiFi.status() != WL_CONNECTED &&
                  millis() - startAttemptTime < 5000)
            {
                delay(500); // 等待连接,每0.5秒检测一次
            }

            // 连接状态检测
            if (WiFi.status() != WL_CONNECTED)
            {
                Serial.println("WiFi connection failed, starting captive portal...");
                handleWiFiConfig(); // 启动强制配置门户(如AP模式)
            }
            else
            {
                Serial.println("WiFi connected");
                timeClient.begin(); // 初始化NTP时间客户端
            }
        }
        file.close(); // 关闭文件释放资源
    }
}

}4.6.7 天气
用于从网络 API 获取天气数据,并根据当前的天气状况在屏幕上显示相应的图标和数据(温度、湿度等)。 先GET请求,再截取返回的Json值,然后做个简单的判断再显示即可
void fetchWeather()
{ // 天气捕捉
    // 天气数据初始化模块(首次运行或需要更新时触发)
if (initweather == false)
{
    // 检测WiFi连接状态(确保网络可用性)
    if (WiFi.status() == WL_CONNECTED)
    {
        WiFiClient client;      // 创建TCP客户端
        HTTPClient http;        // 初始化HTTP客户端

        // 构建带参数的API请求URL(包含动态参数)
        String apiUrl = weatherAPI + weatherapi + "&location=" + cityname + "&language=zh-Hans&unit=c&start=0&days=1";

        // 发起HTTPS连接(注意:实际需确认weatherAPI是否支持SSL)
        if (http.begin(client, apiUrl))
        {
            int httpCode = http.GET();  // 发送GET请求

            // 成功接收响应(httpCode 200表示成功)
            if (httpCode > 0)
            {
                String payload = http.getString();  // 获取完整响应数据

                // 调试输出原始JSON数据(建议在开发阶段开启)
                Serial.println("JSON Response:");
                Serial.println(payload);

                // 创建JSON文档并解析数据
                DynamicJsonDocument doc(2048);  // 建议扩大至2048字节防止数据截断
                DeserializationError error = deserializeJson(doc, payload);

                if (!error)
                {
                    // 提取天气数据(注意字段路径需与API响应结构匹配)
                    String temperature2 = doc["results"][0]["daily"][0]["high"];     // 最高温度
                    String humidity2 = doc["results"][0]["daily"][0]["humidity"];     // 湿度值
                    String weathe2r = doc["results"][0]["daily"][0]["text_day"];     // 天气描述(变量名疑似拼写错误)

                    // 更新全局天气变量
                    temperature = temperature2;
                    humidity = humidity2;
                    weather = weathe2r;
                    initweather = true;  // 标记已完成初始化

                    // 调试输出解析结果
                    Serial.print("Data received: ");
                    Serial.println(temperature);
                    Serial.println(humidity);
                    Serial.println(weather);
                }
                else
                {
                    Serial.println("JSON解析失败: " + String(error.c_str()));
                }
            }
            else
            {
                Serial.printf("HTTP请求失败,错误代码: %d,详情: %s\n",
                            httpCode, http.errorToString(httpCode).c_str());
            }
            http.end();  // 必须释放资源
        }
        else
        {
            Serial.println("服务器连接失败,请检查API地址");
        }
    }
}
    if (weather == "小雨" || weather == "大雨" || weather == "暴雨" || weather == "雨")//识别天气
    {
        do
        {
            u8g2.setFont(u8g2_font_ncenB08_tr);//配置字体
            u8g2.drawXBMP(0, 0, 64, 64, rain);//展示图片
            u8g2.drawStr(64, 20, "Temp");//显示温度
            String temperatureString = String(temperature) + " C";//拼接字符串
            u8g2.drawStr(64, 30, temperatureString.c_str());//屏幕显示
            u8g2.drawStr(64, 50, "Humidity");//内容同上不再注释
            String humidityString = String(humidity) + " %";
            u8g2.drawStr(64, 60, humidityString.c_str());
        } while (u8g2.nextPage());
    }
    else if (weather == "晴")
    {
        do
        {
            u8g2.setFont(u8g2_font_ncenB08_tr);
            u8g2.drawStr(64, 20, "Temp");
            u8g2.drawXBMP(0, 0, 64, 64, sun);
            String temperatureString = String(temperature) + " %";
            u8g2.drawStr(64, 30, temperatureString.c_str());
            u8g2.drawStr(64, 50, "Humidity");
            String humidityString = String(humidity) + " %";
            u8g2.drawStr(64, 60, humidityString.c_str());
        } while (u8g2.nextPage());
    }
    else
    {
        do
        {
            u8g2.setFont(u8g2_font_ncenB08_tr);
            u8g2.drawXBMP(0, 0, 64, 64, cloud);
            u8g2.drawStr(64, 20, "Temp");
            String temperatureString = String(temperature) + " C";
            u8g2.drawStr(64, 30, temperatureString.c_str());
            u8g2.drawStr(64, 50, "Humidity");
            String humidityString = String(humidity) + " %";
            u8g2.drawStr(64, 60, humidityString.c_str());
        } while (u8g2.nextPage());
    }
}4.6.8 运动控制
与小车不同,机器狗不能像小车那样简单控制电机正反转就能实现前进后退,这里需要观察四足动物,进行一些仿生模拟,用舵机模拟四足动物前进时的四足变化情况。
(1)前进
前进的逻辑如下,先将机械狗的2和3号腿向前迈出,再将1和4腿向后蹬出,然后再将2和3腿归位,最后将3和4腿归位即可。这里的speed就是速度,1500是中位值,越远离1500则舵机转速越快,越靠近1500则舵机速度越慢。而且由于SG90舵机是普通电机驱动的,没有磁编码器,所以没有精准的电机控制功能,不能向PID那样精确,每个舵机都会受到摩擦力,导线长短,电流稳定性或各种各样的外部因素影响,所以,为了确保4个舵机能同步,还加入了engineXoffsetXpwm,用于控制各个电机的补偿,这就需要我们耐心去找到适宜的补偿值。4个电机的转动角度一致。
void front()
{
    servo2.write(140); //舵机2旋转至140度
    servo3.write(40);  //舵机旋转至40度
    delay(100);//延时100s
    servo1.write(40);  //内容同上
    servo4.write(140);
    delay(100);
    servo2.write(90);
    servo3.write(90);
    delay(100);
    servo1.write(90);
    servo4.write(90);
    delay(100);
    servo1.write(140);
    servo4.write(40);
    delay(100);
    servo2.write(40);
    servo3.write(140);
    delay(100);
    servo1.write(90);
    servo4.write(90);
    delay(100);
    servo2.write(90);
    servo3.write(90);

}(2)后退
后退的逻辑和前进基本相同,只需要把前进的逻辑反过来就行了。
void back()
{
    servo3.write(140);
    servo2.write(40);
    delay(100);
    servo4.write(40);
    servo1.write(140);
    delay(100);
    servo3.write(90);
    servo2.write(90);
    delay(100);
    servo4.write(90);
    servo1.write(90);
    delay(100);
    servo4.write(140);
    servo1.write(40);
    delay(100);
    servo3.write(40);
    servo2.write(140);
    delay(100);
    servo4.write(90);
    servo1.write(90);
    delay(100);
    servo3.write(90);
    servo2.write(90);

}(3)左转
左转的逻辑略有不同,先要让1和4腿前进30度,再等待2S让2和3腿前进30度,然后再使其归位,重复操作4次,确保转动角度明显。
void left()
{

    int num = 0;
    while (num < 3)
    {
        servo1.write(80);
        servo4.write(80);
        delay(100);
        servo3.write(120);
        servo2.write(120);
        delay(100);
        servo1.write(40);
        servo4.write(40);
        delay(100);
        servo3.write(140);
        servo2.write(140);
        delay(100);
        servo3.write(90);
        servo2.write(90);
        servo1.write(90);
        servo4.write(90);
        delay(100);
        servo1.write(100);
        servo4.write(100);
        delay(100);
        servo3.write(60);
        servo2.write(60);
        delay(100);
        servo1.write(90);
        servo4.write(90);
        delay(100);
        servo3.write(40);
        servo2.write(40);
        delay(100);
        servo3.write(90);
        servo2.write(90);

        num++;
    }
}(4)右转
右转逻辑与左转相同,只需要把左转的反过来即可
void right()
{
    int num = 0;
    while (num < 3)//调用一次执行3次
    {
        servo1.write(100);
        servo4.write(100);
        delay(100);
        servo3.write(60);
        servo2.write(60);
        delay(100);
        servo1.write(140);
        servo4.write(140);
        delay(100);
        servo3.write(40);
        servo2.write(40);
        delay(100);
        servo3.write(90);
        servo2.write(90);
        servo1.write(90);
        servo4.write(90);
        delay(100);
        servo1.write(80);
        servo4.write(80);
        delay(100);
        servo3.write(120);
        servo2.write(120);
        delay(100);
        servo1.write(90);
        servo4.write(90);
        delay(100);
        servo3.write(140);
        servo2.write(140);
        delay(100);
        servo3.write(90);
        servo2.write(90);

        num++;
    }

}(5)坐下
坐下的逻辑就比较简单了,直接让2和4腿向前旋转90度坐下即可。
void sitdown()
{
    servo2.write(140);
    servo4.write(40);
    delay(3000);
    servo2.write(90);
    servo4.write(90);

}(6)趴下
趴下逻辑较为简单,1和3腿左转90,2和4腿右转90,使机械狗水平趴下。
void lie()
{
    servo1.write(180);
    servo3.write(0);
    servo2.write(0);
    servo4.write(180);
    delay(3000);
    servo1.write(90);
    servo3.write(90);
    servo2.write(90);
    servo4.write(90);

}(7)举起左手
举起左手的逻辑也很简单,使3腿旋转90度停顿再归位,往返3次
void toplefthand()
{
    int num = 0;
    while (num < 3)
    {
        servo3.write(0);
        delay(100);
        servo3.write(30);
        delay(100);

        num++;
    }
    servo3.write(90);
}(8)举起右手
举起右手和左手一致,参考左手逻辑修改电机编号即可
void toprighthand()
{

    int num = 0;
    while (num < 3)
    {
        servo1.write(180);
        delay(100);
        servo1.write(150);
        delay(100);

        num++;
    }
    servo1.write(90);
}(9)回收机器狗
使其四腿向内
void dosleep()
{
    servo1.write(0);
    servo3.write(180);
    servo2.write(180);
    servo4.write(0);
}4.6.9 ADC电量检测
(1)电压采样平均
// 对 ADC 数据多次采样并计算平均值
float getAverageAdcVoltage()
{
    long totalAdcValue = 0;

    // 多次采样
    for (int i = 0; i < numSamples; i++)
    {
        totalAdcValue += analogRead(A0); // 读取 ADC 数据
        delay(10);                       // 每次采样间隔 10ms
    }

    // 计算平均 ADC 值
    float averageAdcValue = totalAdcValue / (float)numSamples;

    // 将 ADC 值转换为电压
    return (averageAdcValue / 1023.0) * 1.0; // ESP8266 的参考电压为 1.0V
}(2)电量转换计算
// 计算电池电量百分比的函数
int mapBatteryPercentage(float voltage)
{
    if (voltage <= minVoltage)
        return 0; // 小于等于最小电压时,电量为 0%
    if (voltage >= maxVoltage)
        return 100; // 大于等于最大电压时,电量为 100%

    // 根据线性比例计算电量百分比
    return (int)((voltage - minVoltage) / (maxVoltage - minVoltage) * 100);
}4.6.10 按键中断逻辑
//---------------按键中断部分--------------------------
void ICACHE_RAM_ATTR handleButtonPress()
{

    unsigned long currentTime = millis();// 获取当前系统运行时间(单位:毫秒)

    if (currentTime - lastPressTime > debounceDelay) // 检查按钮1是否满足去抖条件(避免机械抖动导致的误触发)
    {
        buttonPressed = true;     // 设置按钮1按下标志位
        lastPressTime = currentTime; // 更新按钮1的最后有效按下时间
    }
    unsigned long currentTime2 = millis();// 获取当前时间
    if (currentTime2 - lastPressTime2 > debounceDelay2)// 检查按钮2的去抖条件(使用独立的去抖时间和记录变量)
    {
        buttonPressed2 = true;    // 设置按钮2按下标志位
        lastPressTime2 = currentTime2; // 更新按钮2的最后有效按下时间
    }
}4.6.11 串口监听(拓展)
void serialListen(){

    // 读取完整字符串(直到换行符)
    String receivedString = Serial.readStringUntil('\n');
    // 去掉可能的回车符或空格
    receivedString.trim();
    // 处理接收到的字符串
    Serial.print("Received: ");
    Serial.println(receivedString);
    if(receivedString=="front"){//当接收到“front”时
        front();//执行前进
    };
    if(receivedString=="back"){
        back();
    };
    if(receivedString=="toplefthand"){
        toplefthand();
    };
    if(receivedString=="toprighthand"){
        toprighthand();
    };
    if(receivedString=="left"){
        left();
    };
    if(receivedString=="right"){
        right();
    };
    if(receivedString=="sitdown"){
        sitdown();
    };
    if(receivedString=="lie"){
        lie();
    };
    if(receivedString=="dosleep"){
        dosleep();
    };
    if(receivedString=="kaixin"){
        emojiState=0;
    };
    if(receivedString=="shengqi"){
        emojiState=1;
    };
    if(receivedString=="nanshou"){
        emojiState=5;
    };
    if(receivedString=="haoqi"){
        emojiState=3;
    };
    if(receivedString=="xihuan"){
        emojiState=4;
    };
    if(receivedString=="cuowu"){
        emojiState=2;
    };
    if(receivedString=="yun"){
        emojiState=6;
    };
    if(receivedString=="shijian"){
        emojiState=8;
    };
    if(receivedString=="tianqi"){
        emojiState=7;
    };
    if(receivedString=="logo"){
        emojiState=9;
    };


}4.6.12 初始化逻辑
void setup()
{
u8g2.begin();
u8g2.setDisplayRotation(U8G2_R2);
// OLED 显示初始化与按钮中断配置
u8g2.firstPage();  // 启动U8g2页面缓冲绘制
do {
    // 设置显示字体(14像素高度,适合128x64屏幕)
    u8g2.setFont(u8g2_font_ncenB14_tr);

    // 绘制LOGO位图(居中显示计算)
    // 参数说明:X坐标0(左对齐),Y坐标(64/2 -22/2)=21(垂直居中)
    // 位图尺寸:宽度128px,高度22px,数据源为logo数组
    u8g2.drawXBMP(0, (64 / 2 - 22 / 2), 128, 22, logo);
} while (u8g2.nextPage());  // 循环刷新直至完成全帧绘制

// 按钮1配置(通常对应GPIO2)
// 硬件要求:按钮接地触发,内置上拉保持高电平
pinMode(BUTTON_PIN, INPUT_PULLUP);
// 配置下降沿中断(物理按下时产生低电平)
attachInterrupt(digitalPinToInterrupt(BUTTON_PIN), handleButtonPress, FALLING);

// 按钮2配置(通常对应GPIO15)
// 硬件要求:需外接上拉电阻,按钮接3.3V触发
pinMode(BUTTON_PIN2, INPUT);  // 无内部上拉模式
// 配置上升沿中断(物理按下时产生高电平)
attachInterrupt(digitalPinToInterrupt(BUTTON_PIN2), handleButtonPress, RISING);
//启用SPIFFS文件系统
    SPIFFS.begin();
    servo1.attach(engine1, 500, 2500); // 配置舵机PWM,500µs=0度,2500µs=180度
    servo2.attach(engine2, 500, 2500);
    servo3.attach(engine3, 500, 2500);
    servo4.attach(engine4, 500, 2500);
    servo1.write(90);//舵机旋转到90度
    servo3.write(90);
    servo2.write(90);
    servo4.write(90);
    // 初始化串口
    Serial.begin(115200);
    // 设置WiFi为热点模式
    WiFi.softAP(ssid, password);
    Serial.println("热点已启动");
    // 访问的IP地址是 ESP8266 的默认IP:192.168.4.1
    Serial.print("访问地址: ");
    Serial.print(WiFi.softAPIP());
    // 加载WiFi配置
    loadWiFiConfig();
    if (WiFi.status() != WL_CONNECTED)//当WIFI未连接时
    {
        Serial.println("Starting captive portal...");//串口输出
        handleWiFiConfig();//加载WIFI配置
    }
    else
    {
        handleWiFiConfig();//加载WIFI配置
        Serial.println("WiFi connected");
        timeClient.begin();//NTP服务初始化
        timeClient.update(); // 获取初始时间
    }
    delay(5000);
    u8g2.clearDisplay();//清屏
    do
    {
        u8g2.setFont(u8g2_font_ncenB08_tr);
        u8g2.drawXBMP(0, 0, 64, 64, ipip);
        u8g2.drawStr(64, 10, "WIFI_AP");
        u8g2.drawStr(64, 27, "EDA-Robot");
        u8g2.drawStr(64, 43, "192.168.4.1");
        u8g2.drawStr(64, 60, "WIFI CTRL");
    } while (u8g2.nextPage());
    delay(5000);
    u8g2.clearDisplay();
}4.6.13 主循环逻辑
void loop()
{
    if (Serial.available() > 0) {
        serialListen();
    }
    // 对 ADC 数据多次采样并求平均
    float adcVoltage = getAverageAdcVoltage();

    // 将采样的 ADC 电压转换为实际电池电压
    batteryVoltage = adcVoltage * voltageDividerRatio; // 计算电池电压

    // 根据电池电压计算电量百分比
    batteryPercentage = mapBatteryPercentage(batteryVoltage);

    if (buttonPressed)//按键1按下时
    {
        buttonPressed = false; // 清除按键标志
        front();
    }
    if (buttonPressed2)
    {
        buttonPressed2 = false; // 清除按键标志
        back();
    }
    if (emojiState != prevEmojiState)
    {
        u8g2.clearDisplay();         // 状态变化时清屏
        prevEmojiState = emojiState; // 更新状态
    }
    if (freestate)
    {
        delay(3000);
        actionstate = random(0, 10);
    }
    // 可以使用switch优化效率
    switch (actionstate)
    {
    case 0 /* constant-expression */:
        /* code */
        break;
    case 1:
        front(); // 执行一次舵机动作
        actionstate = 0;
        break;
    case 2:
        left(); // 执行一次舵机动作
        actionstate = 0;
        break;
    case 3:
        right(); // 执行一次舵机动作
        actionstate = 0;
        break;
    case 4:
        back(); // 执行一次舵机动作
        actionstate = 0;
        break;
    case 5:
        toplefthand(); // 执行一次舵机动作
        actionstate = 0;
        break;
    case 6:
        toprighthand(); // 执行一次舵机动作
        actionstate = 0;
        break;

    case 10:
        dosleep(); // 执行一次舵机动作
        actionstate = 0;
        break;
    case 7:
        lie(); // 执行一次舵机动作
        actionstate = 0;
        break;
    case 8:
        sitdown(); // 执行一次舵机动作
        actionstate = 0;
        break;
    case 9:
        emojiState = random(0, 7); // 执行一次舵机动作
        actionstate = 0;
        break;
    default:
        break;
    }

    switch (emojiState)
    {
    case 0: // 首页
        u8g2.setFont(u8g2_font_ncenB14_tr);
        do
        {

            u8g2.drawXBMP(0, 0, 128, 64, hi);
        } while (u8g2.nextPage());

        break;
    case 1: // 第二页

        u8g2.setFont(u8g2_font_ncenB14_tr);
        do
        {

            u8g2.drawXBMP(0, 0, 128, 64, angry);
        } while (u8g2.nextPage());

        break;
    case 2: // 第三页
        do
        {
            u8g2.setFont(u8g2_font_ncenB14_tr);
            u8g2.drawXBMP(0, 0, 128, 64, error);
        } while (u8g2.nextPage());

        break;
    case 3: // 第四页
        do
        {
            u8g2.setFont(u8g2_font_ncenB14_tr);
            u8g2.drawXBMP(0, 0, 128, 64, dowhat);
        } while (u8g2.nextPage());

        break;
    case 4: // 第四页

        do
        {
            u8g2.setFont(u8g2_font_ncenB14_tr);
            u8g2.drawXBMP(0, 0, 128, 64, love);
        } while (u8g2.nextPage());
        break;
    case 5:

        do
        {
            u8g2.setFont(u8g2_font_ncenB14_tr);
            u8g2.drawXBMP(0, 0, 128, 64, sick);
        } while (u8g2.nextPage());
        break;
    case 6:
        do
        {
            u8g2.setFont(u8g2_font_ncenB14_tr);
            u8g2.drawXBMP(0, 0, 128, 64, yun);
        } while (u8g2.nextPage());

        break;
    case 7:
        if (WiFi.status() != WL_CONNECTED)
        {
            do
            {
                u8g2.setFont(u8g2_font_ncenB08_tr);
                u8g2.drawXBMP(0, 0, 64, 64, wifi);
                u8g2.drawStr(64, 20, "IP:");
                u8g2.drawStr(64, 40, "192.168.4.1");
                u8g2.drawStr(64, 60, "Need NET");
            } while (u8g2.nextPage());
        }
        else
        {
            fetchWeather();
        }
        break;

        break;
    case 8:
        if (WiFi.status() != WL_CONNECTED)
        {
            do
            {
                u8g2.setFont(u8g2_font_ncenB08_tr);
                u8g2.drawXBMP(0, 0, 64, 64, wifi);
                u8g2.drawStr(64, 20, "IP:");
                u8g2.drawStr(64, 40, "192.168.4.1");
                u8g2.drawStr(64, 60, "Need NET");
            } while (u8g2.nextPage());
        }
        else
        {
            do
            {
                timeClient.update(); // 更新时间
                u8g2.setFont(u8g2_font_ncenB14_tr);
                timeClient.update();
                u8g2.drawXBMP(0, 0, 64, 64, timeimage);
                // 获取当前时间
                // 显示时间到 OLED
                int currentHour = timeClient.getHours();
                int currentMinute = timeClient.getMinutes();
                String timeToDisplay = String(currentHour) + ":" + String(currentMinute);
                u8g2.drawStr(64, 30, "TIME");
                u8g2.setCursor(64, 50);
                u8g2.print(timeToDisplay);

            } while (u8g2.nextPage());
        }
        break;
    case 9:

        do
        {
            u8g2.setFont(u8g2_font_ncenB14_tr);
            u8g2.drawXBMP(0, (64 / 2 - 22 / 2), 128, 22, logo);
        } while (u8g2.nextPage());
        break;
    default:
        // 添加默认 case 来处理其他情况
        break;
    }


}4.7 编译
现在,你应该已经完成了全部的代码编写,但是这些代码是否真正能运行就要看编译有没有报错了
4.7.1 编译主程序
点击底下一排中的勾,开始构建 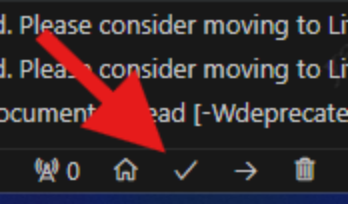 如果显示SUCCESS则表示构建成功
4.7.2 编译FS文件系统
点击左侧PlatformIO的图标,选择Build Filesystem Image 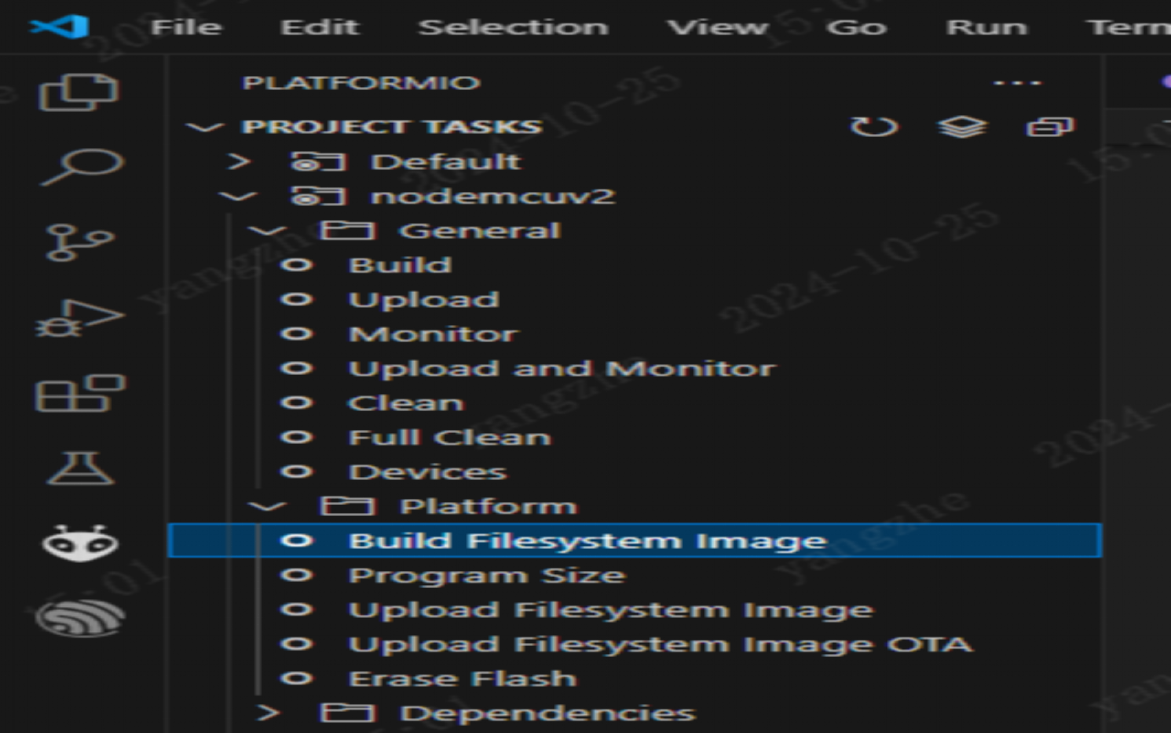 一样,出现SUCCESS则表示构建成功
4.8 烧录
如果编译没有问题,那么恭喜你,程序可以正常运行了,现在你只需要将程序烧录进主控就可以了
4.8.1 接线
在硬件设计中,我们特意为主板设计了下载模式跳线接口,使用跳帽或镊子短接后再上电,即可进入下载模式进行程序下载。然后再将主板上的TX连接到烧录器的RX,主板上的RX连接到烧录器的TX(RX、TX交叉连接) 如果成功进入下载模式,此时在VsCode左下角应该有端口选择按钮,点击选择或使用默认的自动识别都可以。
4.8.2 烧录主程序
方法1:使用官方程序
构建成功后,在.pio/build/nodemcuv2文件夹下,应该会有bin文件和elf文件,这都是固件,只是类型不同,您可以通过这些固件使用官方烧录器烧录 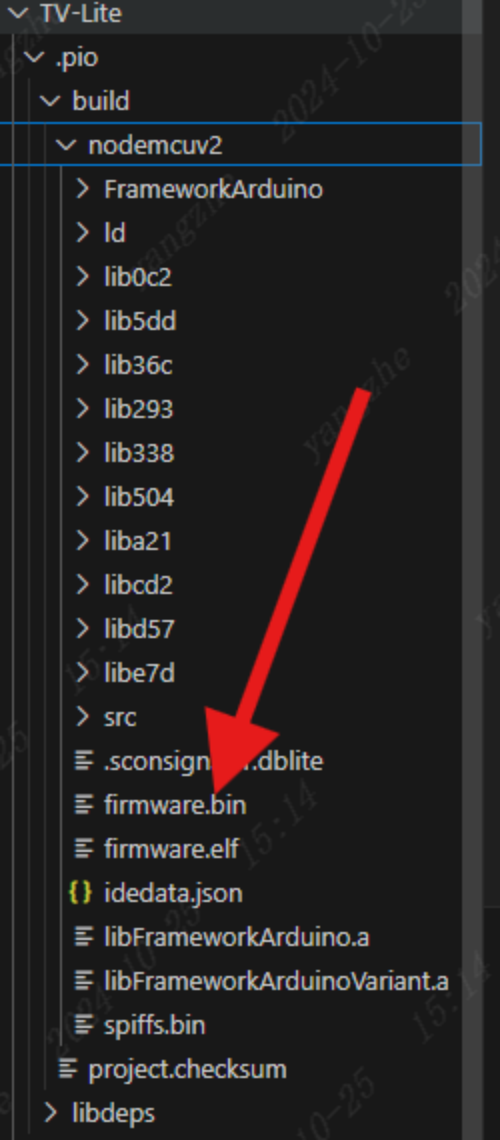
方法2:通过编译器
点击底部箭头,等待烧录完成即可 
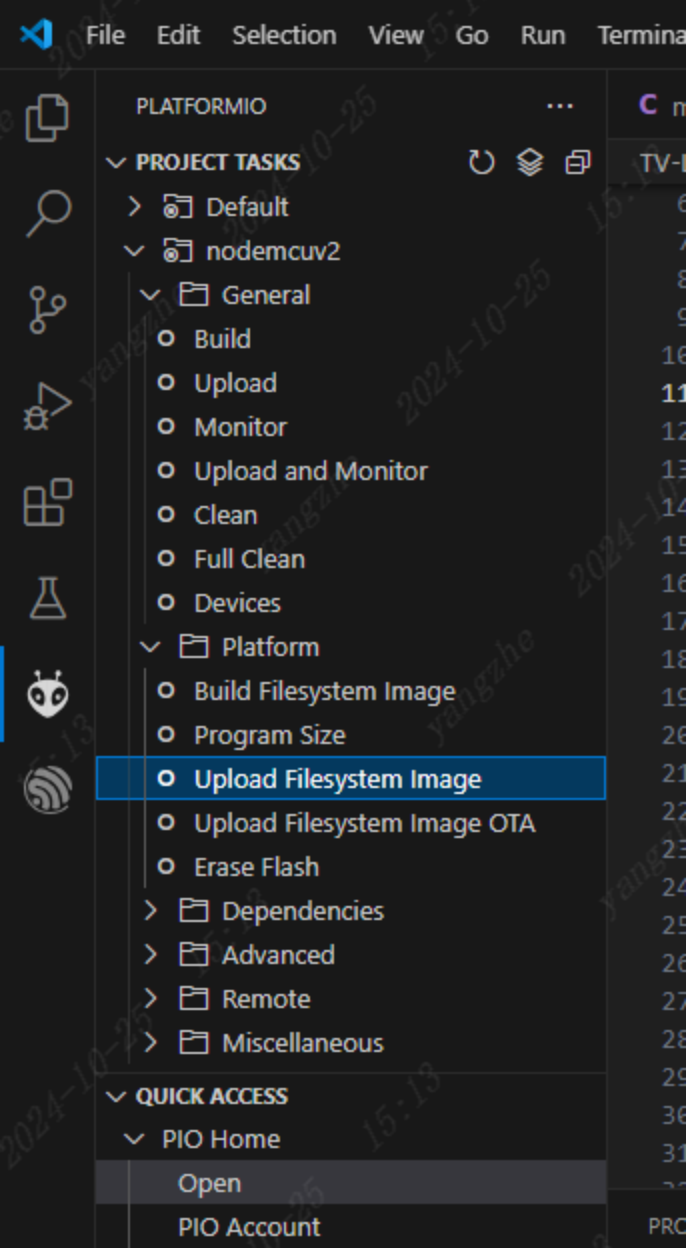
4.8.3 烧录文件系统
方法1:使用官方程序
文件系统的固件同样位于.pio/build/nodemcuv2文件夹下,先烧录完主程序后再烧录文件系统 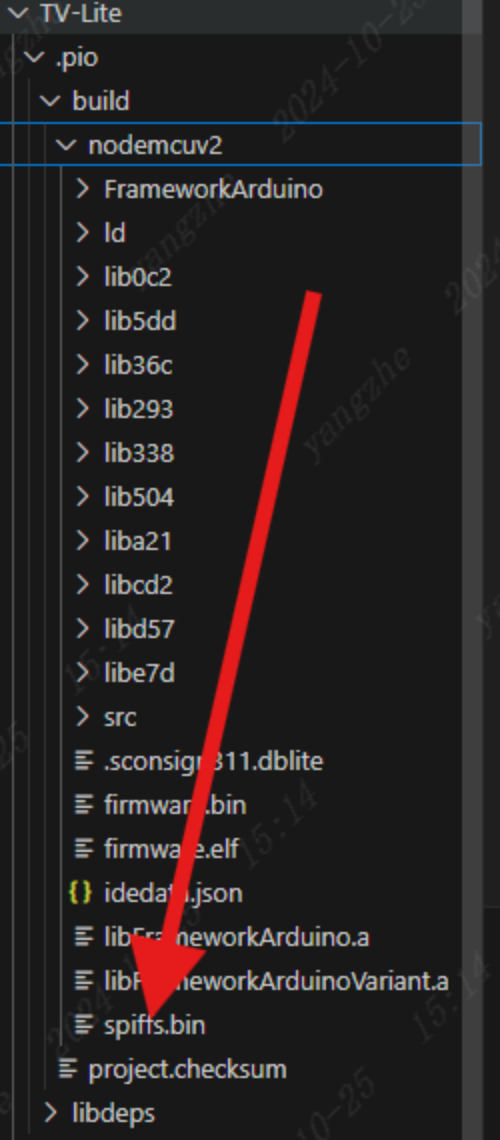
方法2:通过编译器
点击左侧的Upload Filesystem Image,等待烧录完成即可